この記事は [しむどんアドベントカレンダー5日目](https://adventar.org/calendars/2179) の記事です。
TL;DR
- 静的ファイルのホスティングをFirebaseで行った
- firebaseを使うためにfirebase-toolsをインストールした
- firebase deployで静的ファイルをデプロイした
経緯
モチベーション
日々勉強したコードをgithubにpushしています。 記事や文章はQiitaに、コードや画像はGithubに展開して(自分が)見やすいようにしています。しかし成果物の中には静的ファイルであることがしばしばあります。Javascriptのライブラリを試して見たり、code penの写経だったり、Sphinxのドキュメントだったりがそれです。静的HTMLの場合はブラウザで見たいのですが、QiitaやGithubは静的ファイルをブラウザで直接アクセスはできません。
なぜGithub Pagesではダメなのか
Githubには静的ファイルをホスティングするためのGithub Pagesという機能があります。しかしこの機能は、各ディレクトリにindex.htmlが存在しないとファイルが展開されませんでした。そのためSphinxでHTMLを生成した場合サブディレクトリにある画像などが展開されずリンク切れとなってしまいました。
Google Driveは?Dropboxは?OneDriveは?
Google Driveは2016年にこの機能を停止してしまいました。Dropboxも2016年に仕様変更があり使えなくなてしまいました。OneDriveは使えるようでしたが、バグがあるというブログ記事があったので使うのをためらいました。
Firebaseは?
ブログ記事を読んでいるとFirebaseに移行した人がいました。FirebaseとはMBaasとして展開しているサービスで2014年にGoogleに買収されて、今はGoolge傘下のサービスです。MBaasなのでモバイルアプリケーション向けのサービスがメインですが、ホスティングサービスも提供しています。
Firebaseでホスティングする
https://firebase.google.com/docs/hosting/quickstart に書いてあることをそのままやれば良いです。以下はその時の作業ログです。
firebase-toolsのインストールと初期化
firebaseをCLIで操作するにはfirebase-toolsをインストールします。
$ npm install -g firebase-tools`firebase` コマンドが使えるようになります。`firebase init` で初期化します。
$ firebase init

Error: Command requires authentication, please run firebase login
まずは `firebase login` でログインする必要があるようなのでログインします。
$ firebase login
? Allow Firebase to collect anonymous CLI usage information? Yes

Visit this URL on any device to log in:
https://accounts.google.com/o/oauth2/auth?client_id=MASKMASKMASKMASKMASKMASKMASKMASKMASKMASKMASKMASKMASKMASKMASKMASKMASK

Waiting for authentication...

✔  Success! Logged in as [email protected]
$
`firebase login` を実行するとブラウザが開いて、アクセス許可を求められます。許可するとログインが完了します。今度こそ`firebase init`します。
$ firebase init

     🔥🔥🔥🔥🔥🔥🔥🔥 🔥🔥🔥🔥 🔥🔥🔥🔥🔥🔥🔥🔥  🔥🔥🔥🔥🔥🔥🔥🔥 🔥🔥🔥🔥🔥🔥🔥🔥     🔥🔥🔥     🔥🔥🔥🔥🔥🔥  🔥🔥🔥🔥🔥🔥🔥🔥
     🔥🔥        🔥🔥  🔥🔥     🔥🔥 🔥🔥       🔥🔥     🔥🔥  🔥🔥   🔥🔥  🔥🔥       🔥🔥
     🔥🔥🔥🔥🔥🔥    🔥🔥  🔥🔥🔥🔥🔥🔥🔥🔥  🔥🔥🔥🔥🔥🔥   🔥🔥🔥🔥🔥🔥🔥🔥  🔥🔥🔥🔥🔥🔥🔥🔥🔥  🔥🔥🔥🔥🔥🔥  🔥🔥🔥🔥🔥🔥
     🔥🔥        🔥🔥  🔥🔥    🔥🔥  🔥🔥       🔥🔥     🔥🔥 🔥🔥     🔥🔥       🔥🔥 🔥🔥
     🔥🔥       🔥🔥🔥🔥 🔥🔥     🔥🔥 🔥🔥🔥🔥🔥🔥🔥🔥 🔥🔥🔥🔥🔥🔥🔥🔥  🔥🔥     🔥🔥  🔥🔥🔥🔥🔥🔥  🔥🔥🔥🔥🔥🔥🔥🔥

You're about to initialize a Firebase project in this directory:

  /tmp/TIL

? What Firebase CLI features do you want to setup for this folder? Database: Deploy Firebase Realtime Database Rules, Hosting: Configure and
 deploy Firebase Hosting sites

=== Project Setup

First, let's associate this project directory with a Firebase project.
You can create multiple project aliases by running firebase use --add,
but for now we'll just set up a default project.

? What Firebase project do you want to associate as default? [create a new project]

=== Database Setup

Firebase Realtime Database Rules allow you to define how your data should be
structured and when your data can be read from and written to.

? What file should be used for Database Rules? database.rules.json
✔  Database Rules for undefined have been downloaded to database.rules.json.
Future modifications to database.rules.json will update Database Rules when you run
firebase deploy.

=== Hosting Setup

Your public directory is the folder (relative to your project directory) that
will contain Hosting assets to be uploaded with firebase deploy. If you
have a build process for your assets, use your build's output directory.

? What do you want to use as your public directory? public
? Configure as a single-page app (rewrite all urls to /index.html)? No
✔  Wrote public/404.html
✔  Wrote public/index.html

i  Writing configuration info to firebase.json...
i  Writing project information to .firebaserc...

✔  Firebase initialization complete!

Project creation is only available from the Firebase Console
Please visit https://console.firebase.google.com to create a new project, then run firebase use --add
完了すると次のファイルが作成されます。
- .firebaserc
- database.rules.json
- firebase.json
- public/404.html
- public/index.html
firebase deployでデプロイ
それではdeployします。
$ firebase deploy --only hosting

Error: No project active. Run with --project <projectId> or define an alias by
running firebase use --addプロジェクトIdが設定されていないようです。https://console.firebase.google.com/ に移動し、新規プロジェクトを作成をしました。 作成できたら`firebase use -add`を実行してプロジェクトを登録します。
$ firebase use --add
? Which project do you want to add? myproj
? What alias do you want to use for this project? (e.g. staging) master

Created alias master for myproj.
Now using alias master (myproj)
気を取り直して再度deployします。
$ firebase deploy --only hosting

=== Deploying to 'myproj'...

i  deploying hosting
i  hosting: preparing public directory for upload...
✔  hosting: public folder uploaded successfully
✔  hosting: 2 files uploaded successfully
i  starting release process (may take several minutes)...

✔  Deploy complete!

Project Console: https://console.firebase.google.com/project/myproj/overview
Hosting URL: https://myproj.firebaseapp.com
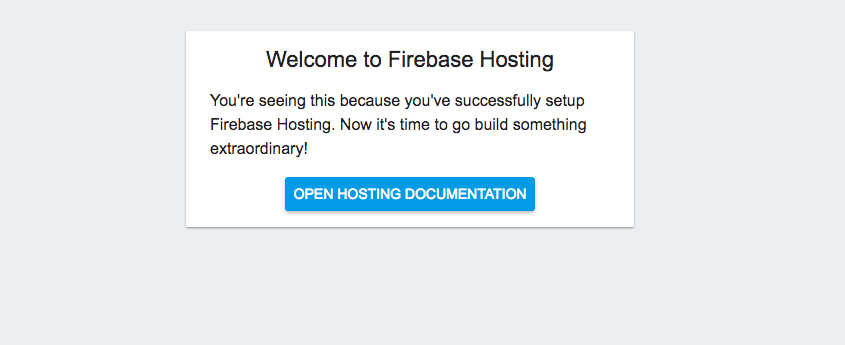
デプロイできたようです。Hosting URLにアクセスすると次のようなデフォルトページが表示されます。
Firebase default page

CircleCIでデプロイする
CircleCIでデプロイするためにはデプロイ用のトークンを発行する必要があります。トークンの発行もfirebaseコマンドを使って行います。 `firebase login:ci` を実行します。
$ firebase login:ci

Visit this URL on any device to log in:
https://accounts.google.com/o/oauth2/auth?client_id=XXXXXXXXXXXXXXXXXXXXXXXXXXXXX

Waiting for authentication...

✔  Success! Use this token to login on a CI server:

XXXXXXXXXXXXXXXXXXXXXXXXXXXXXXXXXXXXXXXXXXXXX

Example: firebase deploy --token "$FIREBASE_TOKEN"
`firebase login:ci` を実行するとブラウザが開きアカウントの選択と権限の許可を求めてきます。それらを選択すると標準出力にトークンが表示されます。そのトークンを使い`firebase deploy`でデプロイします。
$ firebase deploy --token XXXXXXXXXXXXXXXXXXXXXXXXXXXXXXXXXXXXXXXXXXXXXCircleCIでそれを行うにはトークンをEnvironment Variableに設定し、次のようなcircle.ymlを作成します。
dependencies:
  pre:
    - npm install -g firebase-tools

test:
  override:
    - echo OK

deployment:
  production:
    branch: master
    commands:
      - firebase deploy --token=$(FIREBASE_TOKEN)
master branchへのpushが行われた時のみ、firebaseにdeployされます。注意しないといけないのは次のファイルもGitに登録する必要があることです。
- .firebaserc
- firebase.json
- database.rules.json
これらのファイル、公開してしまっても良いものなのだろうか。
参考URL
- [G Suite アップデート ブログ: Google ドライブにおけるウェブ ホスティング機能の廃止について](https://gsuiteupdates-ja.googleblog.com/2015/09/google.html)
- [Google Drive、静的URLによるWebホスティング機能を廃止へ。対応策は? | れいぶろぐ](http://labe.wp.xdomain.jp/post/428)
- https://www.dropbox.com/help/16
- http://ryoichi0102.hatenablog.com/entry/2016/11/01/090408
- https://firebase.google.com/docs/hosting/quickstart